Sunday, August 5, 2007

Sweet Cheat Popcorn

sweet cheat popcorn I've been trying to make a kettle-corn style popcorn and an easy caramel type popcorn for ages. By "easy" I mean-- one pot, no separate caramel making, no additional baking, with butter and salt being optional. Easy, you know?

Every time I just tried adding a little (1/4 cup or less) brown sugar to the heating kernels (stove top popcorn prep), I'd end up with hard granules attached to the corn. Not quite what I was looking for. Not to mention a little hard on my teeth.

I think I finally did it though. It was a total fluke. While the kernels were heating up (again, stove top prep, kernels cooking in a little oil) I added some brown sugar, like usual. Only this time, instead of just stirring and hoping for the best, I also added a little water.

This made all the difference! The water dissolved the sugar (have to stir this mixture until the kernels start popping, then continue cooking with the cover on, keeping the pot moving), and the whole works boiled and became a syrupy consistency by the time the kernels started to pop. The syrupy mixture cooked onto the newly popped kernels and finally I had easy stove top sweet popcorn! Yum!
sweet cheat popcorn
Of course, this probably isn't a secret, and many of you out there, likely already knew this. Silly me though for never thinking of it 'till recently. (I worried that adding water to popcorn makes mush; it probably does if the kernels have popped, but not while they're still kernels.)

So, this adds to the many ways you can make popcorn. To this sweet mixture I've drizzled butter on top and added salt. Very tasty! But probably best as an occasional treat.

The best thing is, made this way, it's tasty as-is, which is exactly what I wanted. A little sweet, without the added butter or extra steps trying to make caramel or having to bake it. Still have to be extra careful of the unpopped kernels. Now they'll likely stick to the popped ones. Eat carefully!

Tuesday, June 19, 2007

Cinnamon Gnocchi

I saw this recipe on Everyday Italian, only, the recipe that was in the episode doesn't quite match the recipe on the website. Strange.

In the episode, she used a half of a cup of sugar, and a tablespoon or so of cinnamon, which is different than the website version.

I made my own version so I guess it doesn't matter. I was kind of bummed that I couldn't get the sugar to dissolve in the butter. At least it looked that way but in the end, the sugar dissolved and this came out pretty good.

I've never had gnocchi before so this was a completely different dessert for me and definitely not the way I intended to have it initially. Nice change. (I intended to add the gnocchi to tomato sauce)

This is how I made this:

1 & 1/2 cups gnocchi, boiled in salted water until tender (per package instructions), and drained

Set this aside.

In the same saucepan that I cooked the gnocchi in (empty now but still hot) I added:

1/2 stick butter
1 cinnamon stick

Melt the butter, and then add:

1/2 cup sugar
1 Tablespoon ground cinnamon

Cook this mixture until the sugar melts, or, 3-5 minutes on low to medium heat, stirring often.

Remove the cinnamon stick. Add the drained gnocchi.

In both the website and TV episode version of this recipe, that was it. Done. In my version, I cooked the gnocchi in the sauce another two minutes.

That's it. Plate it and enjoy.
Definitely have to serve this warm!


I felt better having used much less butter, but wondered if more butter made the sauce thicker. Possibly. But I'd rather have a slightly looser sauce and know I used a lot less butter.


Another good thing about this recipe is the wonderful way it makes your kitchen smell. Dessert and aromatherapy all in one. Nice!

Monday, March 26, 2007

Birds in a Nest

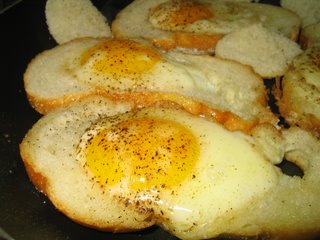
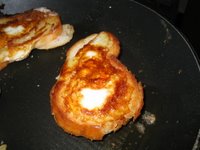
birds in a nestI was half watching a 30 Minute Meals episode and discovered this fun twist on eggs and toast.

My version for two requires 4 eggs, 4 pieces of bread (any sliced bread, I used Italian, and cooked up the cut-outs too), 1-3 TBS. butter, and salt and pepper to taste.

Preheat a frying pan on medium heat. (If you're using a small pan, you can cook these in smaller batches) Use a small cup or circular cutter to cut a circle in the center of each piece of bread. Lower the heat to medium. Melt 1 or two TBS. of butter in the hot frying pan. Arrange your bread in the pan. (I placed the bread in the pan, allowed it to soak up a little butter, then turned it over)

Carefully break an egg into the center of each piece of bread. Pepper to taste. Add a dash of salt if you wish. Cook to desired doneness.

You're basically frying your toast instead of baking it. If you like your eggs soft side up you will be done within 3-4 minutes. If you like them over-easy, just flip and wait a minute.


I like mine well done.


This was kind of fun (new twist, cute name) so it worked nicely. Might try spicing it up a bit next time or sprinkling on some cheese (parmesan or cheddar) right at the end.

Saturday, February 10, 2007

A.B.'s Peanut Butter Fudge (easy!)

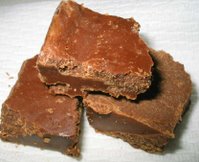
peanut butter fudgeI saw this recipe on Good Eats. Yummmmy!

Sure looked easy. Alton Brown uses a microwave, but I don't have one (really!) so I did this on the stove top. The episode recipe is here. I think mine is the same except that I don't have a scale so I checked for conversions and came up with what I thought was close enough. Someday I hope to try his chocolate fudge. Looked really good in the episode.

This peanut butter fudge recipe is easy!

Before you start, prepare a square (8"x8" or 9"x9") pan by lining it with non-stick foil, waxed paper, or parchment paper. Set aside.

You'll need:

1 cup (2 sticks) butter
1 cup creamy (smooth) peanut butter

Melt this in a saucepan on low heat (or in your microwave), stirring often.

In a (metal or heat safe) bowl, add 1 lb (or about 3 and 3/4 cups) sifted confectioners (powdered) sugar.

Add 1 Tsp. vanilla to the bowl.

peanut butter fudgeWhen the peanut butter and butter is thoroughly melted, add the mixture to the bowl and stir to combine. Mix well! Pour the mixture into the prepared pan and cover with a piece of waxed paper. Refrigerate for a couple of hours (or overnight) and when cool, cut into squares and enjoy!

These were melt in your mouth delicious! Good for the occasional treat.


I also tried a chocolate version of this recipe. I wasn't brave enough to try it without some peanut butter added in case it added something to the texture.
chocolate peanut butter fudge
1/2 cup (1 stick) butter
1/2 cup peanut butter (smooth)
1 and 1/4 cups chocolate chips
2 cups confectioners (powdered) sugar
1 Tsp. vanilla
Prepared the same way as above.

For a little variety, the peanut butter chocolate fudge would work out pretty good. A different mouth feel than the version I usually make (when making easy chocolate "fudge"). Fun to experiment sometimes.

Saturday, January 20, 2007

Bread Pudding

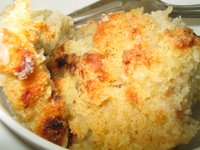
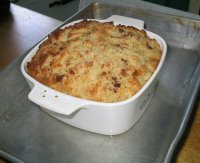
bread puddingThere are so many variations of this recipe out there. I just winged it, and usually do with this recipe. I've made this before and it comes out a little different every time. It always tastes good though, and that's the point. Something about the nutmeg and the milk, comfort food for sure. Very yummy.


This is the recipe I used the last time I made it, and the only thing I would do differently, is add more soy milk. In the bread pudding pictured, I used about 2 cups. The next time I'll use about 2 1/2 to 3 cups.


Ingredients:

8-10 slices white bread, cut in to cubes
2 1/2 - 3 cups soy milk (I used vanilla flavored, you can use regular milk of course)
1/2 - 3/4 cup sugar, plus 2 TBS to sprinkle over the top
Dash salt
4 eggs beaten
1 Tsp vanilla extract
Cinnamon & nutmeg (about 1 Tsp. or to taste, plus a couple of dashes on top)
Non-fat cooking spray

Preheat your oven to 325ºF -- preheat to 350ºF if using metal baking dishes. I used corningware in aluminum, so I cooked this longer, at a lower temperature.

Spray a baking dish with non-fat cooking spray and set aside. Set aside a larger baking pan. The smaller one will sit in the larger one, along with some water.

Place your cut up bread in the smaller baking dish. In a bowl with a whisk, beat the eggs well. Add the soy milk and whisk together. Add the 3/4 cup sugar, the nutmeg, cinnamon, vanilla extract, and salt, and mix well.

Slowly pour the mixture over the cubed bread. Make sure you do not fill your baking dish to the very top. The mixture will rise when cooked and might overflow if the container is too full. Gently press the bread so all of it soaks up the egg mixture.

Sprinkle the remaining 2 TBS. sugar over the top. Sprinkle a little cinnamon and nutmeg over the top as well. Lightly cover with foil (make a little tent so the foil isn't touching the top of the bread pudding), and poke a few holes in the foil so the steam can vent while cooking.

Place the empty, larger baking dish on a center rack in your oven. Carefully place the smaller, foil covered baking dish inside the larger one. Carefully pour hot tap water in the larger baking dish until the water level is just less than 1/2 up the side of the smaller baking dish.

bread pudding, water bath(This is called a "water bath" and is to ensure even, gentle heating of your custard)


Depending on your cooking vessel and oven, cook for 30-40 minutes and remove the foil cover. Cook for another 20-40 minutes, checking at the 20 minute mark. When the bread pudding is done, it will rise a little in the baking dish, be golden brown on top, and a toothpick inserted in the center will come out clean.

This is my version which is much thicker. In a milkier version, (the kind I'll make next time!) the bread pudding custard will be a little runny, and will feel slightly firm, and even jiggle a little when the baking dish is gently shaken. The toothpick should still come out clean though.

This is best served warm, and can be gently reheated. Very much a tasty comfort food.

Monday, December 18, 2006

Devilled Eggs

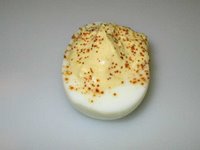
devilled egg
There are many devilled egg recipes out there. This is a quick version I tried. They weren't pretty but they sure tasted good.

You will need:

6 hardboiled eggs, shells removed
1/2 Tsp. ground mustard seed or 1-2 Tsp. mustard (the kind you'd put on your sandwich)
1-2 TBS. (per taste) cider or red wine vinegar
1/4 cup (plus 1 TBS. if needed) mayonnaise
Pepper (to taste)
Dash of salt
Paprika

Cut the eggs in half and reserve the yolks in a small bowl. Arrange the egg halves on a plate. Add the mustard, vinegar, salt, pepper, and some of the mayo to the bowl of egg yolks and mash together with a fork or the back of a tablespoon. Add a little more mayonnaise as needed to make the yolks loose enough to spoon or pipe into your egg halves.

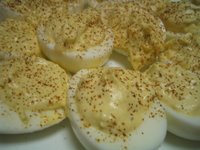
I spooned the yolk mixture into the egg halves, then sprinkled with paprika.

As an alternative, you can use a zip top or flap top sandwich bag, spoon the yolk mixture into the bag, work the mixture to one corner, snip the corner with a clean pair of scissors, and squeeze the mixture on to each egg half in a decorative swirl. That would create a much prettier result than mine.

devilled eggs
These were tasty though, and I made them because wanted to see how difficult they were to make (they were easy!) and how they would taste. For a gathering, I would try a little harder to make them look better. For a snack at home with family, these were very good as is.

Friday, November 24, 2006

Easy Appetizer Meatballs

A few years ago my aunt started making these scrumptious meatballs for holiday snacking and I've always wanted to try making them myself because they were just so good. Had I known how easy they could be to make, I would've made them much sooner. (She always calls them "Swedish meatballs" but technically they're just flavored, and very tasty!)

She uses frozen meatballs for this but you can make your own, which is what I did. If you use frozen meatballs, prepare those per package instructions or bake them as I baked my home made ones.

Her recipe is a lot like the rest of the recipes in our family, kind of loose without exact measurements so you can experiment with the amounts to find what you like the best.

If anyone knows the original recipe for this I would be happy to attribute it.


This is how I made them:

--Meatballs--

1 lb ground beef (any ground meat of choice or combination would do fine but since it's the sauce that make this so good, you might want to save the more expensive stuff for another meal)
1 egg
1 onion finely diced or shredded (I shredded)
dash of milk
3 baby carrots, shredded (for moisture, and an added touch of "veggie")
1/2 cup or so of breadcrumbs plain or flavored (or 2 slices of bread, dampened with water, then squeezed of the excess water; I used Italian flavored breadcrumbs)
Dash of pepper
Dash of thyme

Mix the above ingredients together well.

On a baking sheet (the kind with sides, lined with foil, or a wire rack with a tray to catch the fat) that you've sprayed with non-stick cooking spray-- roll the mixture into small 1 inch or smaller balls and place on your bake ware of choice. Only a small amount of room in between meatballs is required. They do not lump together when cooking.

Cook at 350ºF for about an hour. Halfway through the cooking time you can turn each one (or if you're using the pan with sides, just give the pan a little shake) and continue cooking.

When the meatballs are cooked (cut one in half and make sure it's cooked all the way through) remove them from the oven and lower your oven temperature to 325ºF.

Place your meatballs in a baking dish. I used a corningware casserole container for the next step.

--The Sauce--

In a small bowl mix the following together:

1 cup of barbeque sauce
4-5 heaping tablespoons of grape jelly (yep, I was surprised too)
1/4 cup water (optional, I added this water, it wasn't part of the recipe)

Pour the mixture over the cooked meatballs.

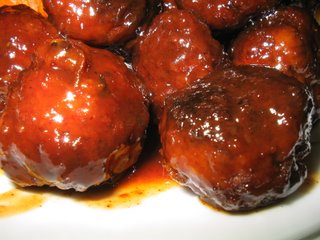
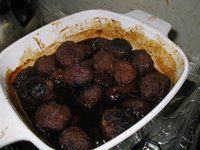
Bake (at 325ºF) covered (I cover with foil) for 45 minutes to an hour. The mixture will be bubbly and dark.
Meatballs


And that's it, you're done!

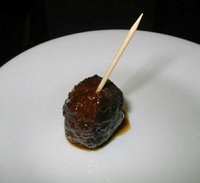
appetizer meatballsServe with toothpicks at your next gathering, or as a sweet and special side with some veggies and your favorite potato or rice.

I think the only thing I would do differently next time is make these meatballs just a little smaller. Mine were slightly bigger than the inch size. Other than that, they were very good. There is a taste-difference between the packaged (ready-made) meatballs and home made of course, but it all comes down to how much time you have and what you're making them for. Making this for a party? The frozen variety will save you prep time, and they taste good so go for it.

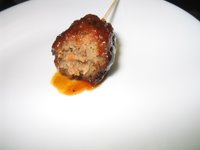
meatballs

It was good to make these, and find they tasted as good as my aunt's version. Something different and tasty that reminds me of holidays and family time. Can't go wrong with that.