Good Recipes
Wednesday, August 1, 2012
Moroccan Grilled Salmon
Ingredients
1/2 cup plain yogurt
Juice of 1 lemon, plus lemon wedges for garnish
1 tablespoon extra-virgin olive oil, plus more for the grill
2 to 3 cloves garlic, smashed
1 1/2 teaspoons ground coriander
1*1/2 teaspoons ground cumin
Kosher salt and freshly ground pepper
4 6-ounce skinless center-cut salmon fillets
1/4 cup chopped fresh cilantro or parsley, for garnish
Directions
Stir together the yogurt, lemon juice, olive oil, garlic, coriander, cumin, 1/4 teaspoon salt, and pepper to taste in a small bowl. Pour half of the sauce into a large resealable plastic bag; cover and refrigerate the remaining sauce. Add the salmon to the bag and turn to coat with the marinade. Refrigerate for 20 to 30 minutes, turning the bag over once.
Preheat a grill to medium-high. Remove the salmon from the marinade and blot off excess yogurt with paper towels. Lightly oil the grill and add the salmon; cook, turning once, until browned on the outside and opaque in the center, 4 to 6 minutes per side, depending on the thickness. Serve with the reserved yogurt sauce and garnish with the herbs and lemon wedges.
Honey-Soy Broiled Salmon
Ingredients
1 scallion, minced
2 tablespoons reduced-sodium soy sauce
1 tablespoon rice vinegar
1 tablespoon honey
1 teaspoon minced fresh ginger
1 pound center-cut salmon fillet, skinned (see Tip) and cut into 4 portions
1 teaspoon toasted sesame seeds (see Tip)
Directions
Whisk scallion, soy sauce, vinegar, honey and ginger in a medium bowl until the honey is dissolved. Place salmon in a sealable plastic bag, add 3 tablespoons of the sauce and refrigerate; let marinate for 15 minutes. Reserve the remaining sauce.
Preheat broiler. Line a small baking pan with foil and coat with cooking spray. Transfer the salmon to the pan, skinned-side down. (Discard the marinade.) Broil the salmon 4 to 6 inches from the heat source until cooked through, 6 to 10 minutes. Drizzle with the reserved sauce and garnish with sesame seeds.
How to skin a salmon fillet: Place salmon fillet on a clean cutting board, skin-side down. Starting at the tail end, slip the blade of a long knife between the fish flesh and the skin, holding down firmly with your other hand. Gently push the blade along at a 30° angle, separating the fillet from the skin without cutting through either.
To toast seeds: Cook in a small dry skillet over medium-low heat, stirring constantly, until fragrant and lightly browned, 2 to 4 minutes.
Salmon Cakes
Ingredients
Vegetable or canola oil, for frying
3 (6-ounce) portions cooked salmon or 3 (6-ounce) cans salmon, drained well
1 1/2 cups cracker meal
2 large eggs, beaten
2 rounded teaspoons Old Bay seasoning blend
1/2 red bell pepper, seeded and finely chopped
20 blades fresh chives, snipped or chopped
2 to 3 tablespoons fresh dill, a handful, finely chopped
1 teaspoon cayenne pepper sauce
1 lemon, zested and juiced
Salad greens
Coarse salt
Extra-virgin olive oil, for drizzling
1/2 cup mayonnaise or reduced fat mayonnaise
1/2 cup chili sauce
2 tablespoons dill pickle relish
Directions
Heat a large, heavy skillet with 1 inch of frying oil over moderate heat.
Flake the cooked cooled salmon with a fork. Add cracker meal to the bowl and work through the fish with your hands. Add the eggs, seasoning, pepper, chives, dill, pepper sauce, and the zest of one lemon to the bowl. Combine the ingredients well with your hands. If the mixture is a little wet, add a bit more cracker meal. Form 3-inch patties of salmon cakes 1-inch thick. You should yield 8 to 10 cakes. Fry cakes until golden in a single layer 3 or 4 minutes on each side. Drain on paper towel lined plate.
Toss salad greens with coarse salt and the juice of the lemon you zested. Drizzle the greens with a little extra-virgin olive oil and re-toss the salad to coat.
Combine mayonnaise, chili sauce and relish in a small dish. To serve, place salmon cakes on a bed of baby greens, 2 cakes per person and top with chili mayonnaise sauce
Fired Up Rosemary Salmon
Ingredients
1 fillet salmon, skin-on, between 5 to 7-pounds
1 tablespoon butter
Salt and freshly ground black pepper
2 to 3 bunches fresh rosemary sprigs, plus more, for garnish
Lemon or orange slices
Directions
Preheat oven to 350 degrees F.
Using small fish tweezers remove pin bones from the length of the salmon and discard.
Place salmon skin side down on tin foil in a large roasting pan and season with a tablespoon of butter, salt and pepper. Place the sprigs of rosemary and lemon slices over the salmon so that they are overlapping and form a tent over the salmon. Wrap each salmon in the tin foil and roast for 15 minutes or until internal temperature reaches 145 degrees F on an instant-read thermometer.
Remove the salmon from the oven and bring to a well ventilated outdoor area. Light the oven dried rosemary on fire over the salmon. Let the ash fall over the salmon leaving streaks of concentrated rosemary flavor.
Using a large fish spatula, remove the side of salmon from the roasting pan and place on a platter. Garnish with sprigs of fresh rosemary and lemon wedges.
Jammin' Salmon Burgers
Ingredients
For Burgers:
2 teaspoons freshly chopped parsley leaves
1/2 Vidalia onion, diced
2 eggs
1/2 cup panko bread crumbs
1/2 teaspoon cracked black pepper
1 teaspoon kosher salt
1 lemon, zested
4 tablespoons Dill Mayonnaise, recipe follows
2 (6 1/2-ounce) cans Alaska skinless and boneless pink salmon, drained well
2 tablespoons grapeseed oil
Directions
Preheat oven to 400 degrees F.
In medium bowl, combine, parsley, onions, eggs, panko, black pepper, salt, lemon zest and Dill Mayonnaise together. Add drained salmon and mix well together. Make 4 patties and set aside.
In a large skillet on medium, heat 2 tablespoons of grapeseed oil. Place burgers in skillet. Cook over medium heat until browned. Turn and brown other side. Place in oven for 3 to 4 minutes.
Serve on buns with Dill Mayonnaise.
Dill Mayonnaise:
1/2 cup mayonnaise
1/2 lemon, juiced
2 tablespoons freshly chopped dill leaves
Pinch cayenne pepper
1/2 teaspoon salt
1/2 teaspoon cracked black pepper
Combine all the ingredients in a small bowl and set aside.
Friday, May 27, 2011
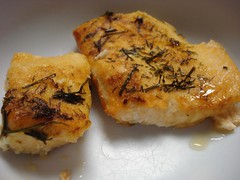
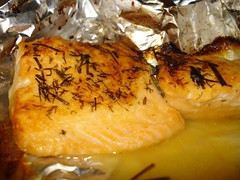
Baked Salmon
It's among the easiest of my recipes, but I never think to post it. Since this blog's in danger of becoming a "dessert blog" I thought I should post something healthy too :)
I can remember years ago not liking salmon at all but one day I decided to try it again and I guess tastes do change because I like this a lot these days.
Among the fillet-type fish I used to favor mild white fish, but given a choice (unless one is stuffed, I love stuffed foods) between baked (no-filling) cod (or similar) and baked salmon, I think I'd choose the salmon. It's meaty, but soft and mild. Unlike tilapia, which to me is the 'meatiest' fish I've ever had and I don't like it very much for some reason. Maybe that will change too, someday. For now, bring on the salmon!
Simple Salmon
1 salmon fillet (one side has skin, a lengthwise cut; same method for a steak)
dill (fresh or dried), to taste
lemon and pepper, to taste
non-fat cooking spray (or a little olive oil, or non-stick aluminum foil)
Line your cooking vessel of choice with foil (regular or non-stick).
Spray on some non-stick spray. Lay your fillet skin-side-down (if it's a steak, either side down is fine).
Sprinkle with dill, and drizzle with a little lemon.
Bake at 350ºF, uncovered, until firm and pink throughout. Depending on the size of your fish steak/fillet, about 30-45 min.
Add more lemon to taste. And pepper if you like. Pairs well with rice and veggies or flaked over pasta.
Delicious!
Thursday, March 24, 2011
Instructables
I love the Instructables website. Lot's of how-to's on just about everything and lots of fun stuff in general. Plenty of things I wouldn't dare try but some, like the recipes I do. Here's a few shots of a few I tried, with the links to the relating Instructable. I don't want to detail these because the instructions are pretty good as is.
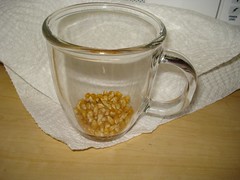
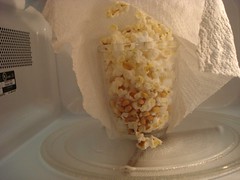
First thing was the Microwave-in-a-mug popcorn, for when you want just a little bit.
This worked great except I won't use a glass mug anymore because it gets screaming hot and stays that way for a long time. The photos are from the first try, as you can see I used too much popcorn so next time I know to use a little less.
Using the same mug (on a different day), I tried the Brownie for one, a "from scratch," single-serve brownie dessert that you can make as gooey as you like.
It wasn't pretty but it was very good. Definitely a quick fix for a chocolate urge.
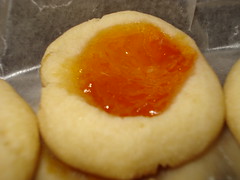
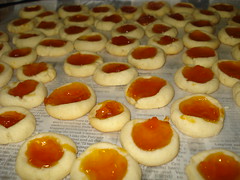
I wanted to make thumbprint cookies for Christmas and searched for recipes. The one that looked the best to me were the Miniature Danish Cookies.
These were fun to make. I think I made them smaller than I should have but that just made more cookies, which isn't a bad thing at all. I also made chocolate thumbprints but that was another recipe (found here, minus the mint).
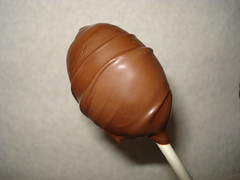
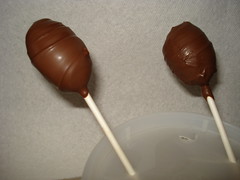
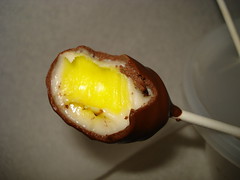
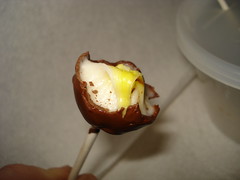
The latest Instructable I tried were the homemade Cadbury-like Creme Eggs.
Wow, these were awesome! Not an exact match to a Cadbury Creme Egg, but as close as you can get. I made a half batch of the linked recipe and that was about 12 mini eggs. I don't have egg molds so I made them into pops. I don't think it would be difficult at all to work our way through a whole batch, so next time I plan to make the full recipe. I froze a couple of them too, so I can see if they're good once defrosted. I stored the rest in the fridge. They didn't last long!
I have a bunch more Instructables saved as favorites to try sometime so I may have more experiments to post at some point. These were fun and easy, always a plus.
Subscribe to:
Posts (Atom)